
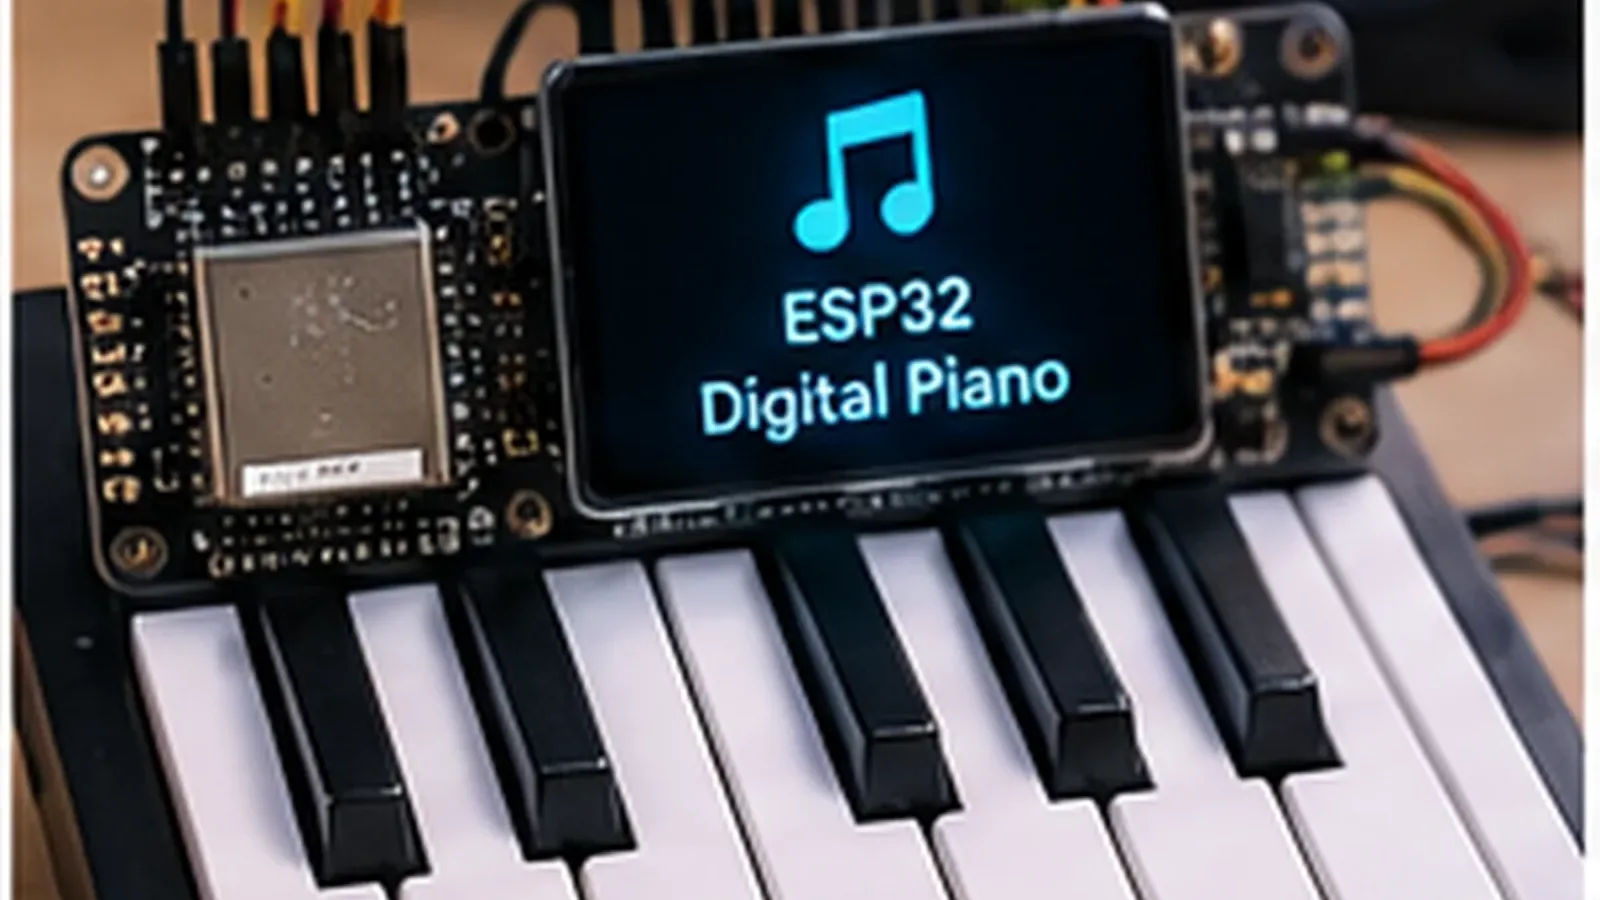
Build a Touch-Key Digital Piano
The Story
This project turns GPIO behavior into something musical. Touch pads become keys, code maps keys to frequencies, and a passive piezo plays one note at a time. This Golden version keeps the promise narrow: the parts list, code constants, GPIO table, expected output, safety notes, and troubleshooting all describe the same low-voltage educational build.
Explain Like I'm 12
Each copper pad is a key. When your finger touches it, the ESP32 touch reading drops and the code plays the matching note frequency. The ESP32 is the decision maker: it reads one signal, compares it with simple rules, then changes an output you can see or hear.
Learning Support
- Recommended ageAges 10+
- Adult supervisionAdult help is useful when cutting copper tape and checking touch-pad wires.
- Classroom useGood for showing input mapping, frequency, and PWM sound in one short lab.
- Parent promptAsk which code number changes pitch and which wire makes sound.
- Screen-free activityWrite a one-octave melody on paper using C4 to C5 note names.
- Next challengeAdd a small amplifier module before trying a real speaker.
- Skills practiced
- Capacitive touch input
- LEDC PWM sound
- Array mapping
- One-output safety
- Learning outcomes
- Map eight ESP32 touch pins to notes.
- Generate safe square-wave tones on a passive piezo.
- Explain why a speaker needs an amplifier or driver.
- Change pitch or melody values in code.
- Mini experiments
- Change one frequency and listen to the pitch shift.
- Slow the loop delay and notice touch response.
- Reorder the NOTES array to make a new scale.
Safety Standards
- Unplug USB before changing jumper wires. Recheck 3.3 V, 5 V, and GND before reconnecting power.
- Do not power motors, pumps, LED strips, or servos from the ESP32 3.3 V pin. Use a suitable external supply and common ground.
- Breadboards are for low-current prototypes. Move high-current or unattended builds to proper terminals, enclosure, strain relief, and fusing.
- Relay and mains-voltage projects require isolation, correct relay ratings, enclosed wiring, and qualified adult supervision.
What You Will Build
A one-octave touch piano using ESP32 capacitive touch pads and a passive piezo buzzer on GPIO25.
Learning Objectives
- Map eight ESP32 touch pins to notes.
- Generate safe square-wave tones on a passive piezo.
- Explain why a speaker needs an amplifier or driver.
- Change pitch or melody values in code.
Components List
- ESP32 DevKit boardUSB-programmable ESP32 board used as the controller.
- Passive piezo buzzerPWM-driven sound output on GPIO25; not a high-current speaker.
- Copper tape touch padsEight touch pads connected to touch-capable GPIO pins.
- Jumper wiresOne wire from each pad to the matching touch GPIO.
Bill of Materials
| Part | Qty | Estimated Cost | Notes |
|---|---|---|---|
| ESP32 DevKit board | 1 | Varies | USB-programmable ESP32 board used as the controller. |
| Passive piezo buzzer | 1 | Varies | PWM-driven sound output on GPIO25; not a high-current speaker. |
| Copper tape touch pads | 1 | Varies | Eight touch pads connected to touch-capable GPIO pins. |
| Jumper wires | 1 | Varies | One wire from each pad to the matching touch GPIO. |
Wiring
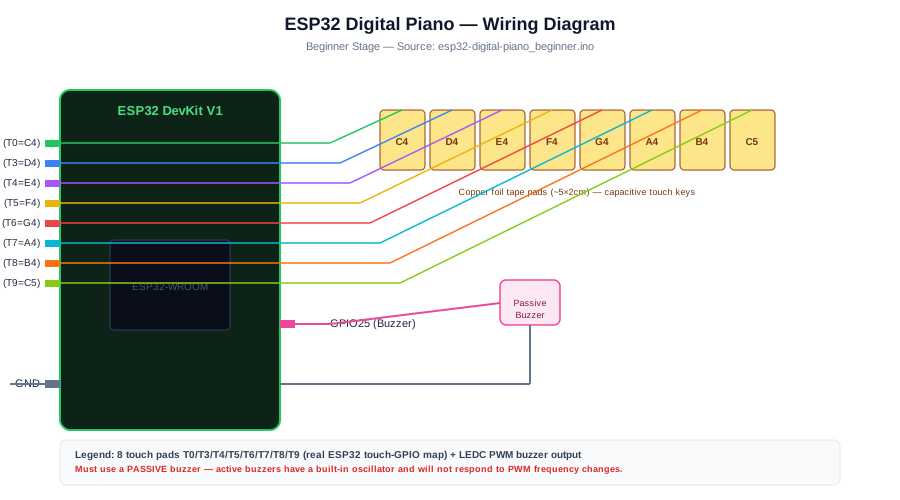
Eight copper pads connect to touch GPIOs 4, 15, 13, 12, 14, 27, 33, and 32. The passive piezo connects to GPIO25 and GND.
-
1
Unplug USB before moving touch-pad or buzzer wires.
-
2
Connect copper pads C4, D4, E4, F4 to GPIO4, GPIO15, GPIO13, and GPIO12.
-
3
Connect copper pads G4, A4, B4, C5 to GPIO14, GPIO27, GPIO33, and GPIO32.
-
4
Connect passive piezo positive to GPIO25 and negative to GND.
-
5
Keep touch pads from touching each other.
-
6
Reconnect USB and open Serial Monitor.
GPIO Mapping
| Signal | ESP32 Pin | Direction | Notes |
|---|---|---|---|
| Touch keys C4-D4-E4-F4 | GPIO4 / GPIO15 / GPIO13 / GPIO12 | Input | Capacitive touch inputs; avoid external pulls that affect boot. |
| Touch keys G4-A4-B4-C5 | GPIO14 / GPIO27 / GPIO33 / GPIO32 | Input | Capacitive touch inputs. |
| Passive piezo | GPIO25 | PWM Output | LEDC square-wave output. |
Circuit Explanation
The touch pads act as capacitive inputs. GPIO25 outputs a PWM square wave to a passive piezo when a touched key is detected.
Engineering Explanation
Some touch GPIOs are also boot-sensitive pins, so the pads must not be tied to fixed voltage rails. The code plays the first touched key only.
Libraries
- Arduino ESP32 coreUses built-in touchRead and LEDC functions.
Code
Copy into Arduino IDE. Install any libraries noted in the component guides first.
// ESP32 Digital Piano - capacitive touch keys and passive piezo
const int NOTES[8] = {262, 294, 330, 349, 392, 440, 494, 523};
const char* NAMES[8] = {"C4", "D4", "E4", "F4", "G4", "A4", "B4", "C5"};
const int TOUCH_PINS[8] = {4, 15, 13, 12, 14, 27, 33, 32};
const int BUZZER_PIN = 25;
const int TOUCH_THRESHOLD = 40;
const int BUZZER_CHANNEL = 0;

void setup() {
  Serial.begin(115200);
  ledcSetup(BUZZER_CHANNEL, 262, 8);
  ledcAttachPin(BUZZER_PIN, BUZZER_CHANNEL);
  ledcWrite(BUZZER_CHANNEL, 0);
  Serial.println("Touch one copper pad to play one note.");
}

void loop() {
  int played = -1;
  for (int i = 0; i < 8; i++) {
    if (touchRead(TOUCH_PINS[i]) < TOUCH_THRESHOLD) {
      played = i;
      break;
    }
  }
  if (played >= 0) {
    ledcChangeFrequency(BUZZER_CHANNEL, NOTES[played], 8);
    ledcWrite(BUZZER_CHANNEL, 128);
    Serial.printf("Playing: %s (%d Hz)\n", NAMES[played], NOTES[played]);
  } else {
    ledcWrite(BUZZER_CHANNEL, 0);
  }
  delay(10);
}
Code Explanation
TOUCH_PINS maps each copper pad to a note in NOTES. When touchRead drops below 40, LEDC changes GPIO25 to that note frequency.
Expected Output
Serial Monitor prints the note name and frequency when a pad is touched. The passive piezo plays one square-wave note and becomes silent when no pad is touched.
Troubleshooting
- No note plays Check GPIO25 piezo wiring and confirm Serial Monitor prints a key name.
- Wrong note plays Check the copper pad wire order against TOUCH_PINS.
- Notes trigger by themselves Increase TOUCH_THRESHOLD only after observing touchRead values.
Common Mistakes
- Using an active buzzer, which cannot play different pitches well.
- Connecting a speaker directly to GPIO25.
- Letting copper pads touch each other.
- Adding pull resistors to touch pins.
Testing Checklist
- Touch each pad one at a time.
- Confirm the printed note order C4 through C5.
- Change one frequency and upload again.
- Power-cycle and verify no key is stuck on.
Engineering Tips
- Keep pad wires short.
- Use a passive piezo for direct GPIO demos.
- Move to an amplifier for louder audio.
Upgrade Ideas
- Add a melody playback button.
- Add octave shift values.
- Add an I2S DAC and amplifier for better sound.
Real-World Applications
- Music coding lesson
- Touch input demo
- PWM frequency experiment
FAQs
Is this full polyphony?
No. The beginner sketch plays one touched key at a time.
Can I use a speaker?
Use an amplifier or driver, not a speaker directly on a GPIO pin.
Why are some touch pins boot-sensitive?
Several ESP32 touch pins also affect boot, so do not force them HIGH or LOW with extra hardware.
Review, Testing, and References
Author: Abdul Mubeen and the ESP32 Engine editorial team. Last updated: 2026-06-27. Reviewed: wiring logic, Arduino code structure, beginner safety, and learning sequence.
Educational level: Beginner. Estimated completion time: 60-75 min. This project is for learning and prototyping; production or unattended hardware needs additional engineering review.
Project Complete!
You completed ESP32 Digital Piano as a trustworthy ESP32 learning build with matching wiring, code, testing, and safety boundaries.
- Capacitive touch input
- LEDC PWM sound
- Array mapping