
Before you start
- Hardware
- Classic ESP32-WROOM DevKit with verified 4 MB flash, USB data cable and a trusted 2.4 GHz Wi-Fi LAN shared with the upload computer. No external actuators.
- Software
- Arduino-ESP32 3.3.2 and its bundled ArduinoOTA/espota uploader. ESP32 Dev Module, 4 MB flash and default OTA-capable partition scheme.
- Prerequisite
- Identify the exact board and use a known USB data cable. Arduino examples follow the Serial-only IDE first-upload guide; CircuitPython uses its separate firmware workflow.
- Expected result
- After the first USB install, a network port becomes available. A second build changes the Serial build ID after successful OTA/restart; this is an expected test, not a recorded upload.
- Review limits
- Documentation review and automated content/browser checks only. Examples have not been compiled, uploaded or tested on physical hardware.
USB, partitions and a reachable network
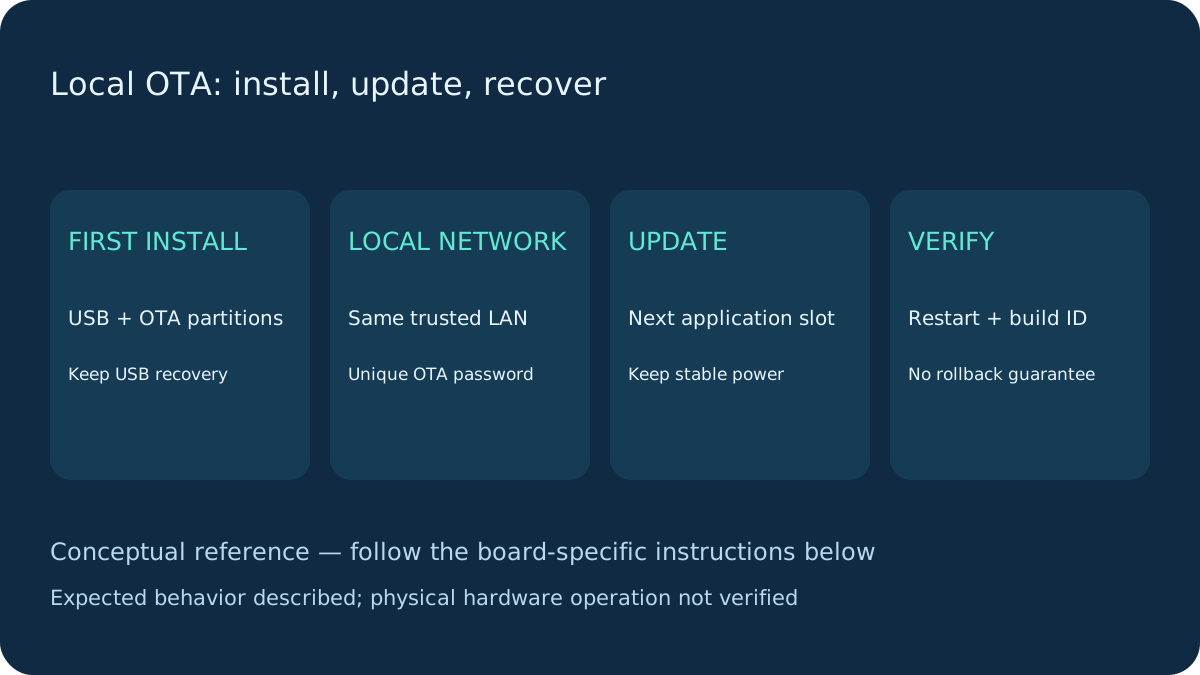
OTA cannot install its own first firmware on a blank board. Upload this sketch over USB first. Keep that cable and the correct board profile available for recovery. The pinned default 4 MB partition table has otadata plus app0/ota_0 and app1/ota_1, each 0x140000 bytes (1.25 MiB). The new binary must fit an app slot. A No OTA/Huge APP scheme with one application slot does not meet this example’s requirements.
Use the core 3.3.2 uploader as well as its library; old host tools can have incompatible authentication. The computer and board need mutual LAN reachability. Guest isolation/VPNs/firewalls can block discovery or the upload connection; internet access is not required.
Install by USB, then change the build ID
Replace all three credential placeholders and upload by USB. Verify the printed IP at 115200. In the IDE port menu select the discovered esp32-ota-lab network port while keeping the same board, flash and partition settings. Change BUILD_ID to ota-test-2 and upload, supplying the OTA password when prompted. After reboot reconnect to the USB Serial port and confirm the new build ID. A successful transfer message alone is not a functional test of the new application.
Keep Wi-Fi settings and ArduinoOTA setup/handle in future builds or you can lose the network update route. Network-port discovery uses mDNS; if the port is missing inspect local discovery/firewall first rather than changing partitions blindly. Different boards should have distinct hostnames.
Wiring and matching Arduino code
Complete local-network ArduinoOTA example
USB powers/programs the stated board. No GPIO wiring required; credentials are placeholders.
ota-local-classic.ino
#include <WiFi.h>
#include <ArduinoOTA.h>

const char* SSID = "YOUR_WIFI_SSID";
const char* PASSWORD = "YOUR_WIFI_PASSWORD";
const char* OTA_PASSWORD = "REPLACE_WITH_A_UNIQUE_OTA_PASSWORD";
const char* BUILD_ID = "usb-baseline-1"; // Change to ota-test-2 for the next upload.
constexpr uint32_t WINDOW_MS = 20000, RETRY_MS = 30000;
bool trying = false, otaReady = false;
uint32_t attemptAt = 0;
void startWiFi() {
  attemptAt = millis(); trying = true;
  WiFi.begin(SSID, PASSWORD);
  Serial.println("Starting bounded Wi-Fi window");
}
void setup() {
  Serial.begin(115200);
  Serial.print("Build: "); Serial.println(BUILD_ID);
  WiFi.mode(WIFI_STA); WiFi.setAutoReconnect(false);
  ArduinoOTA.setHostname("esp32-ota-lab"); // Use a different name per board.
  ArduinoOTA.setPassword(OTA_PASSWORD);
  ArduinoOTA.onStart([]() { Serial.println("OTA starting; keep power on"); });
  ArduinoOTA.onEnd([]() { Serial.println("OTA transfer finished"); });
  ArduinoOTA.onError([](ota_error_t error) {
    Serial.printf("OTA error code: %u\n", unsigned(error));
  });
  startWiFi();
}
void loop() {
  const uint32_t now = millis();
  if (WiFi.status() == WL_CONNECTED) {
    trying = false;
    if (!otaReady) {
      ArduinoOTA.begin(); otaReady = true;
      Serial.print("OTA host esp32-ota-lab, IP: "); Serial.println(WiFi.localIP());
    }
    ArduinoOTA.handle(); // Regular service; transfer processing can block.
  } else {
    if (otaReady) { ArduinoOTA.end(); otaReady = false; }
    if (trying && now - attemptAt >= WINDOW_MS) {
      WiFi.disconnect(false); trying = false;
      Serial.println("Wi-Fi window expired; USB recovery remains available");
    }
    if (!trying && now - attemptAt >= RETRY_MS) startWiFi();
  }
  delay(2);
}
Bounded connections and a real recovery route
The loop allows a 20-second Wi-Fi window and starts attempts no more often than every 30 seconds. It starts/stops the OTA service as Wi-Fi availability changes. ArduinoOTA.handle must run regularly; synchronous transfer handling can occupy the loop, so this is not a real-time control design.
For authentication errors check the password and core/uploader version. Begin failures can indicate a missing OTA partition or oversized sketch; connection/receive failures need network and power checks. If the new sketch crashes or removes OTA, restore a known build over USB. Do not advertise automatic rollback: the default example does not implement application health validation or a guaranteed rollback policy. Avoid changing the partition layout through this ordinary sketch update.
Password protection is not an encrypted update system
setPassword enables the pinned library’s challenge/response authentication; it does not encrypt the firmware transport or enable secure boot, firmware signing or flash encryption. Do not describe this as HTTPS/TLS OTA. Use a unique password, an isolated trusted LAN and no router port forwarding. Keep secrets out of public repositories. Production remote updates need a separate reviewed authenticity, transport, key-management and recovery design.
Keep stable power during flashing. This no-actuator example does not establish safe behavior for heaters or motors during reboot or failed updates.
Next steps
Use the stated board and firmware assumptions. Compare actual observations with Expected result before extending the example.
Technical references
- BasicOTA at 3.3.2 — Callbacks and authentication baseline.
- ArduinoOTA 3.3.2 implementation — Authentication and service lifecycle.
- Default 4 MB partition table — Two application slots and OTA data.
- ESP-IDF 5.5 OTA reference — Partition/recovery architecture; not a claim this sketch enables rollback.